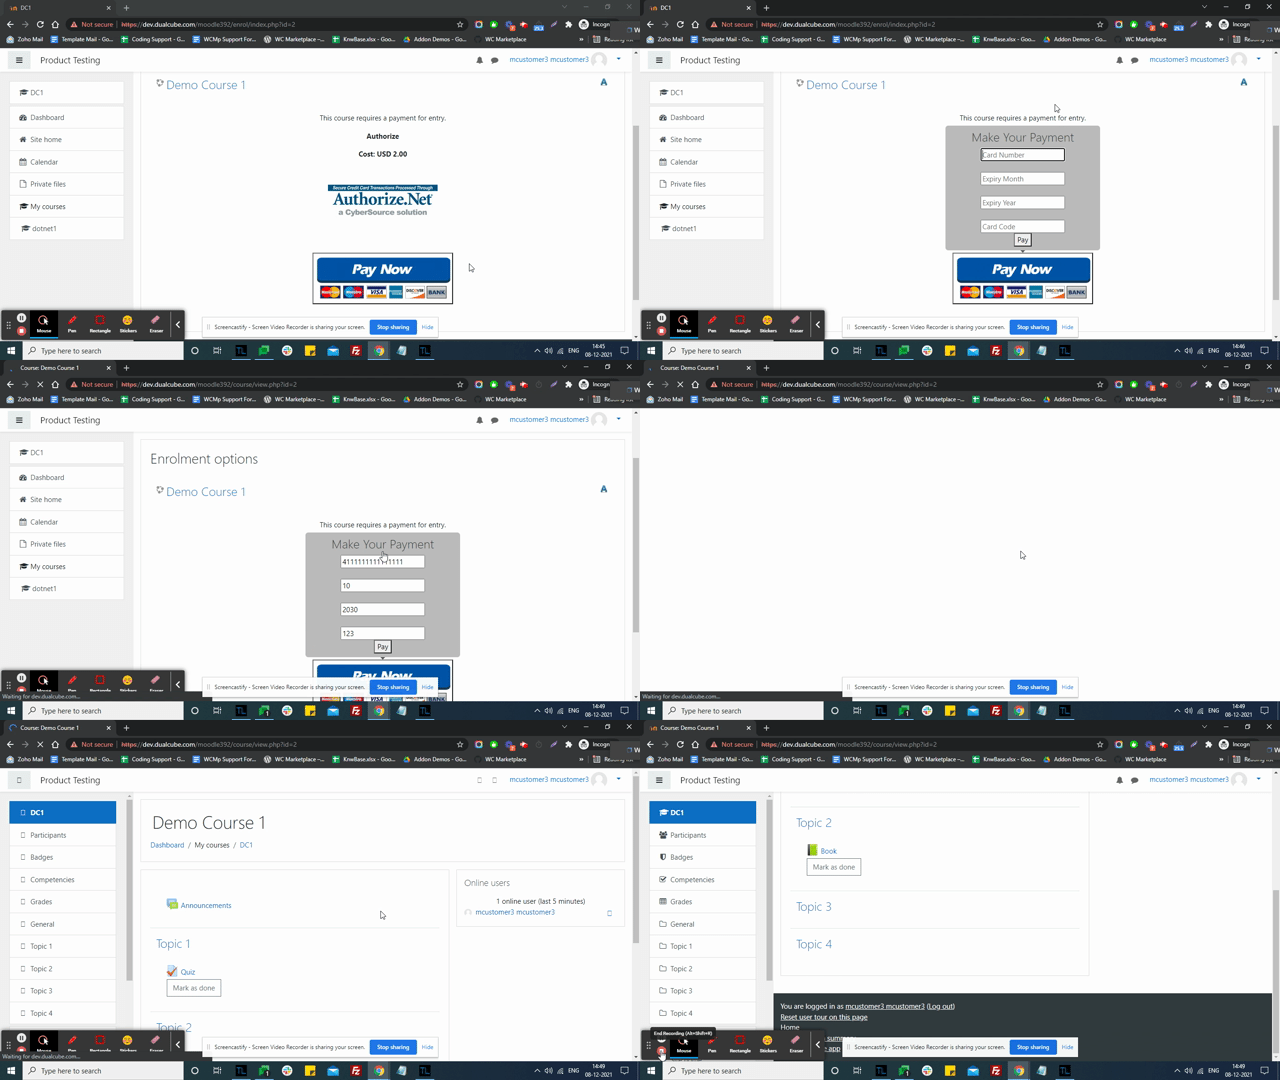
This plugin helps admins and webmasters use Authorize.net as the payment gateway. PAuthorze.net is one of the most commonly used payment gateways and offers considerable number of features unsupported by other payment gateways like Paypal. This plugin has all the settings for development as well as for production usage. Its easy to install, set up and effective.
Installation Guidence : #
Login to your moodle site as an “admin user” and follow the steps.
1) Upload the zip package from Site administration > Plugins > Install plugins. Choose Plugin type ‘Enrolment method (enrol)’. Upload the ZIP package, check the acknowledgement and install.
2) Go to Enrolments > Manage enrol plugins > Enable ‘Authorize.net’ from list
3) Click ‘Settings’ which will lead to the settings page of the plugin
4) Provide merchant credentials for Authorize.net, select the checkbox as per requirement. Save the settings.
5) Select any course from course listing page.
6) Go to Course administration > Users > Enrolment methods > Add method ‘Authorize.net’ from the dropdown. Set ‘Custom instance name’, ‘Enrol cost’ etc and add the method.
This completes all the steps from the administrator end. Now registered users can login to the Moodle site and view the course after a successful payment.

Note: You need to configure the Default Relay Response URL in you authorized.net account. The Relay Response URL will be “http://your_moodle_website/enrol/authorizedotnet/ipn.php”
To add a Default Relay Response URL: #
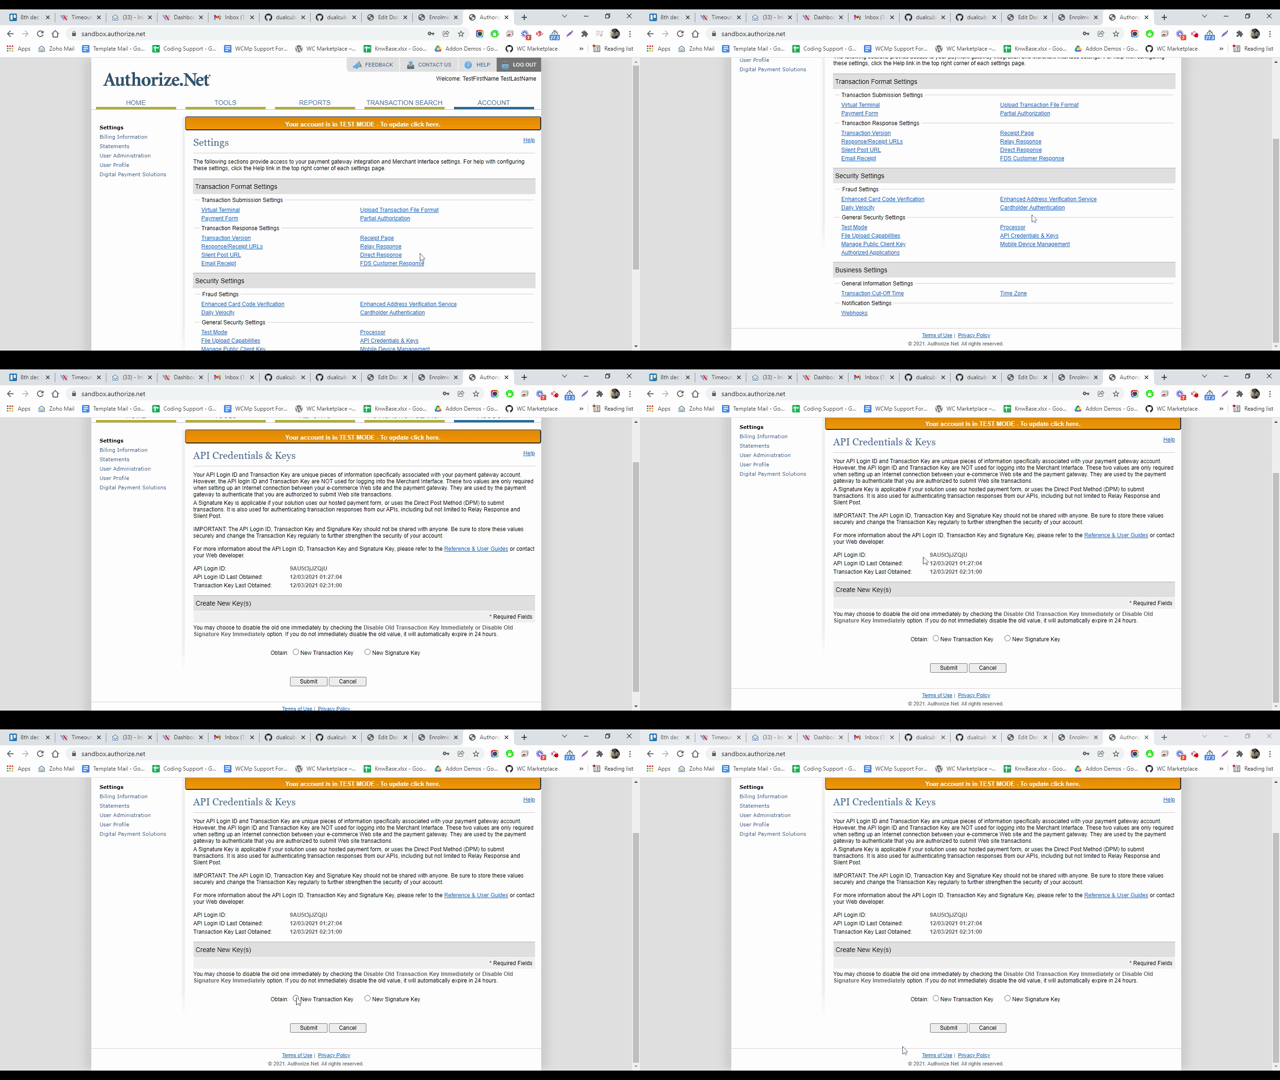
- Log into the Merchant Interface at https://account.authorize.net/ or Sandbox Interface https://sandbox.authorize.net/.
- Click Account from the main toolbar.
- Click Response/Receipt URLs under Transaction Format Settings.
- Click Edit next to Default Relay Response URL. The Relay Response page appears.
- In the URL text field, enter the URL where the payment gateway should send the transaction response. This URL must start with either “http://” or “https://”. Parameterized URLs are not permitted.
- Click Submit. A confirmation message indicates that the URL has been added.
To add a URL to the list of authorized Response or Receipt URLs: #
- Log into the Merchant Interface at https://account.authorize.net/ or Sandbox Interface https://sandbox.authorize.net/.
- Click Account from the main toolbar.
- Click Response/Receipt URLs under Transaction Format Settings.
- Click Add URL.
- Enter the new URL. This URL must start with either “http://” or “https://”.
- Click Submit.
Login to the Sandbox Merchant Interface #
- You can access the Sandbox Merchant Interface at https://sandbox.authorize.net.
- Use the Login ID and Password you created when signing up for your sandbox account. If you forgot your credentials, use the links on Sandbox Merchant Interface sign-in page to recover them.
- The default answer to the secret question “What is your Pet Name?” is “Simon”
- Access your API Login ID and Transaction key by clicking Account > API Login ID and Transaction Key in the Sandbox Merchant Interface.
- Always use sandbox in Live Mode. Because the sandbox does not connect to the card networks, you can safely use it in Live Mode without fear of creating actual transactionsGetting StartedLearn about the Authorize.Net API FeaturesBrowse our API Reference guide and try it using the interactive console or look at sample codeUse the language SDK of your choice on our Hello World page
- Testing Your IntegrationReview the Testing Guide, use test card and account numbers to simulate specific error conditions


