

Brief Introduction #
This plugin helps admins and webmasters use Stripe as the payment gateway. Stripe is one of the popular payment gateways. This plugin has all the settings for development as well as for production usage. It is easy to install, setup and effective.
Added features include:
- Completely SCA support provides 5 layer of internal checking for security while the payment is processed giving you the most secure Payment processing confidence ever.
- Coupon functionality while enrolling students with percent-off or amount-off discount
- Full course name and site logo on stripe checkout
- Ability to set custom stripe transaction statement descriptor for each course
Admins and Webmasters, now, can create, manage, and keep track of all promotional codes directly in their Stripe dashboard.
Requirements #
- PHP is version 5.6 or greater (compatible with the latest PHP 7.3 too)
- Moodle 3.0
Stripe Payment Installation Guide #
Method I – Download Stripe Payment
- Download the plugin from the Moodle.org : https://moodle.org/plugins/enrol_stripepayment
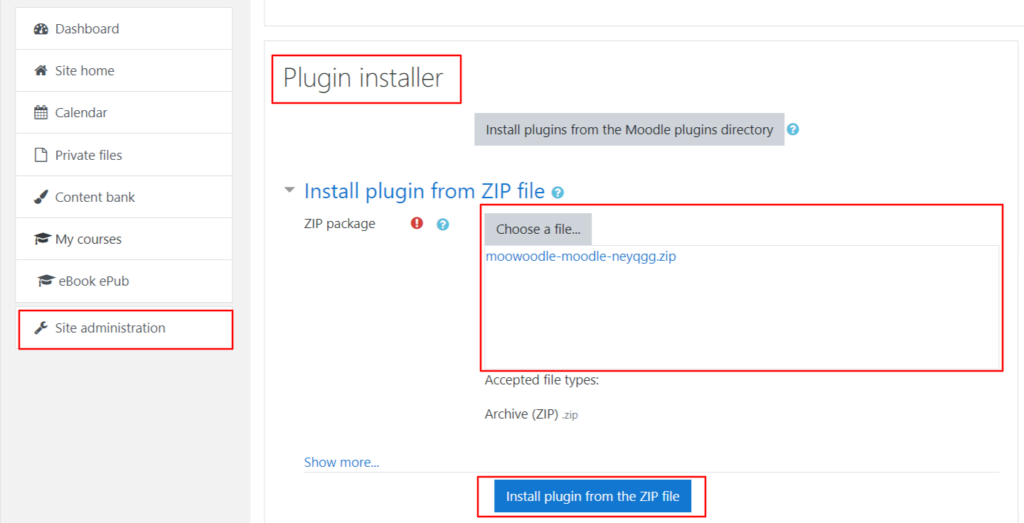
- Open your Moodle Site Administrator Page and navigate to the Plugin menu option. From the Plugin menu list, select Install Plugin from Zip File option.
- Copy and paste the Stripe file downloaded from the Moodle site
- Once installed select “Install Plugin from Zip File” to get started instantly
Method II – Add Stripe Payment
- Go to Moodle.org and navigate to the Plugins menu option
- Once the Plugin page loads select the Add New option.
- On the Add New page drag your mouse to the Search field and type MooWoodle
- Once the MooWoodle Plugin option appears, select the Install button
- Once Installed click on the Activate button to get started with Moodle
- Install and Activate Stripe Payment
- Next the Moodle database will be upgraded. Though you can already set up the plugin options at this stage, it is recommended to leave the plugin options at the default settings at first and just click Save Changes to continue.
Method III – Installing manually at the server
- If you can’t deploy the plugin code via the administration web interface, you have to copy it to the server file system manually
- Log into your server admin, your destination will be: /path/to/moodle/enrol/ and Unzip the plugin file
- In your Moodle site (as admin) go to the dashboard, you will get the installation prompt.
- Then follow the same process to “Upload and install via ZIP file”
Stripe Payment Setup #
- Once stripe is active, you will be redirected to the set up page.
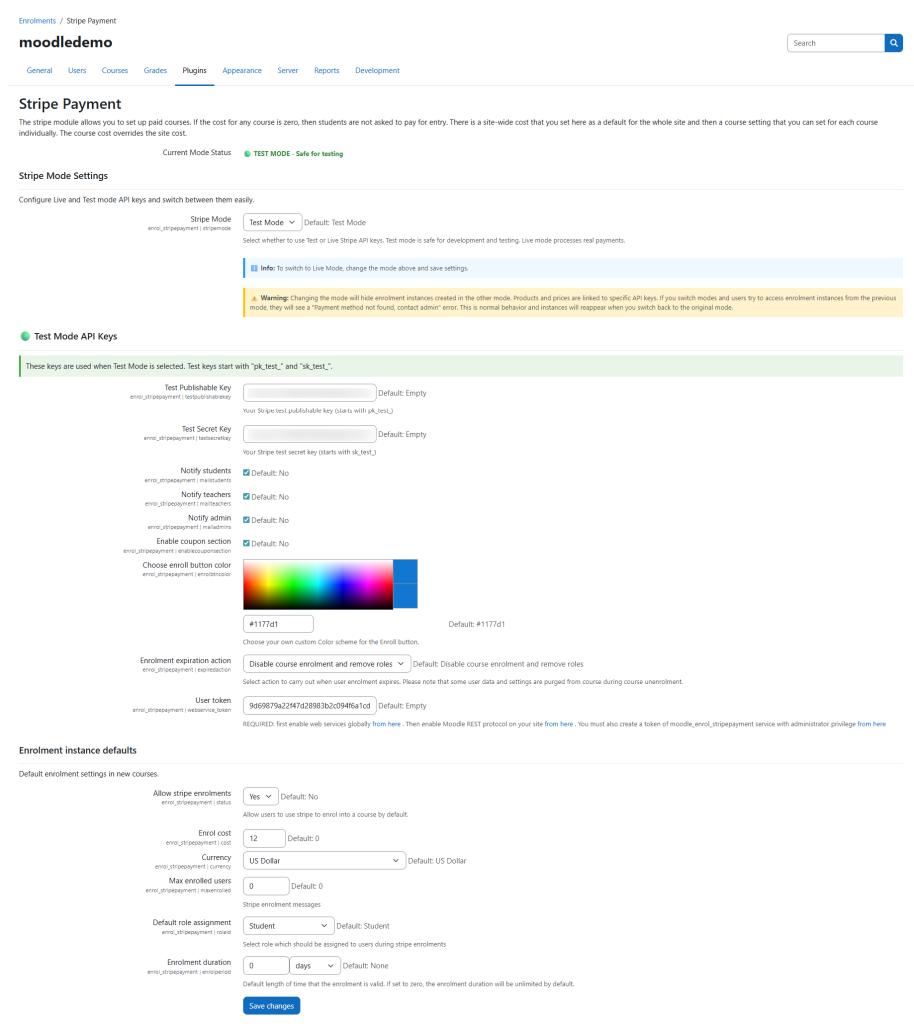
- Add Client ID, Publishable key and Secret key obtained from Stripe.
- Enable Web Service via Server >> Web Service >> Overview and Enable web services
- Make sure to enable the REST API via Site administration >> Server >> Web services >> Manage protocols
- Also create the token via Site administration >> Server >> Web services >> Manage tokens. At the time of generating the token, make sure to select the “Administrator” as a user. Copy the token generated here.
- Now Go back to your stripe settings page and add the token here.
- Enable Stripe as an enrollment option.
8. These following options will send payment notifications if enabled :
- Notify students
- Notify teachers
- Notify admin
That’s it, you are now ready to set up the cost for the courses.
Set up cost for Courses #
You can set two types of cost :
- Global : The global Course determines the default price of each course, in case the course doesn’t have any price assigned to it. In order to set this up, follow these steps :
- In Course Administration > Plugins > Enrolment methods, click the edit/hand/pen icon to the right of the Stripe option.
- Set global course cost under “Enroll cost” option
- Using the “Currency” settings, you can set the currency your site will be using for the course
- Per Product : In order to set individual cost for each course, you need to navigate to the course. Under the Participant tab, you can select the Enrollment option as Stripe.
- Optional: Give a name to this enrolment method if you wish in “Custom Instance name”
- Ensure that “Allow Stripe Subscription enrolments” is set to “yes”
- In “Enrol cost”, type in the cost of your course and in “Currency” choose your currency.
- Usually you would leave the “Assign role” as “student” unless you have a very special reason for allowing your users to enrol as, say, editing teachers etc
- If you want to limit the number of users that can be enrolled using this, please put a numerical value in the ‘Max Enrolled Users’ field.
- Click the “Save changes” button.
Setting Up Coupons #
You can offer unlimited promo codes to your students. You have full control on application of the coupons:
- Offer discount by a percentage or a flat amount
- Coupons can be applied to every invoice
- Coupons can be applied to one invoice
- You can set duration of the coupon activation
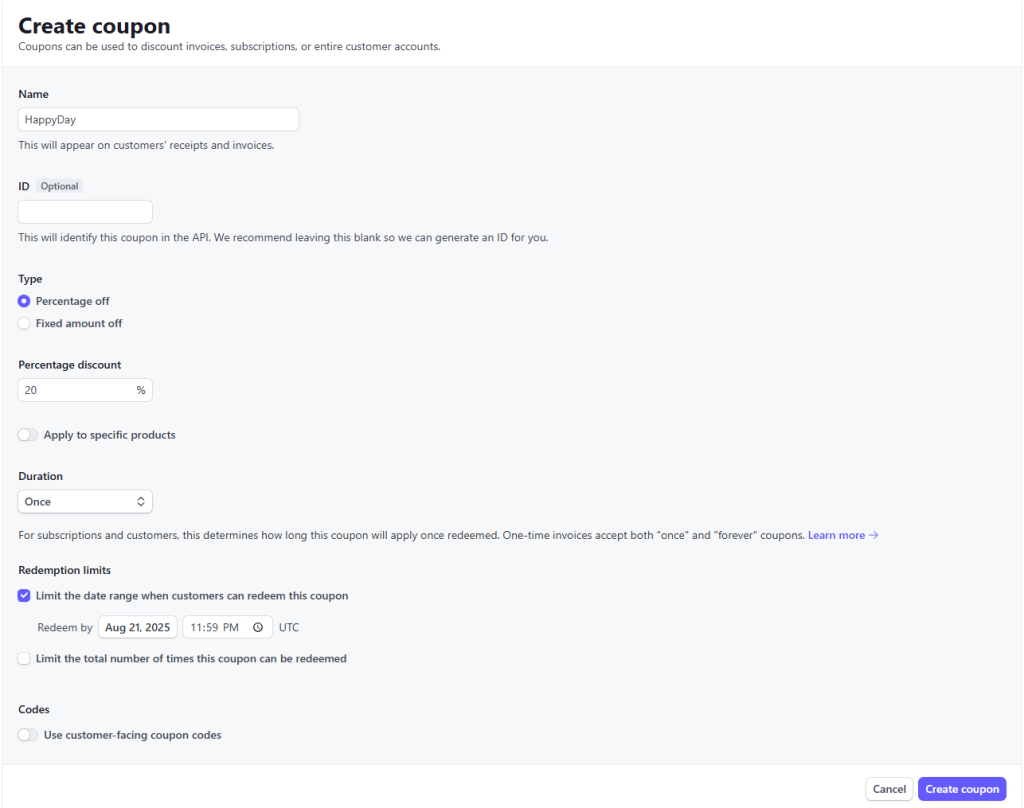
In order to create the coupon you have to login to your stripe account and follow the steps :
- Go to your Stripe Dashboard > Product > Coupons > Create a coupon.
- Type in the coupon’s name: it can be anything and for your reference only.
- Type in the Coupon’s ID: This is the Coupon code that your students will need to enter if they want to avail of the discount.
- For further information, you may check Stripe’s Document https://stripe.com/docs/payments/checkout/discounts
Multiple Instance Support #
We have introduced multiple instance support in the Moodle Stripe plugin. This means you can now add Stripe as a payment method multiple times within the same course.
Why is this important? #
- Flexible pricing options – You can configure different payment plans (e.g., one-time, installments, or region-specific pricing) for the same course.
- Better user experience – Learners can choose from multiple payment setups based on their preference or location.
- Advanced customization – Admins and teachers can experiment with different payment flows without being limited to a single Stripe configuration.
This feature ensures that course creators have more control, flexibility, and scalability when managing payments in Moodle.

A student can opt for any of the two method while purchasing the course :
