Table of Contents
This document provides step-by-step instructions on installing and activating the plugin. It will walk you through the process, ensuring a smooth setup and activation of the plugin on your system.
MooWoodle Installation #
The process of installing and activating the MooWoodle Plugin is remarkably straightforward. Below, we outline how to install the MooWoodle plugin:
- Download the plugin from the WordPress https://wordpress.org/plugin/moowoodle
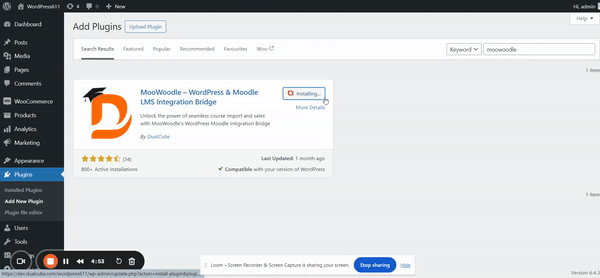
- Open your WordPress Dashboard and navigate to the Plugin menu option. From the Plugin menu list, select Add New sub-menu option.
- Once the Add New page Loads select the Upload option found on the top, near the Add New heading
- Copy and paste the MooWoodle file downloaded from the WordPress site
- Once installed select Activate to get started instantly
MooWoodle Pro #
In order to install the pro version goto your My Account section. When you will download the file MooWoodle Pro , unzip the folder, install MooWoodle Pro in WordPress site and Auth MooWoodle for Moodle in Moodle end.
Our MooWoodle Pro Bundle Package comprises two plugins:
- MooWoodle Pro: This plugin is designed to be installed on your WordPress site. The accompanying document will provide detailed instructions on configuring the MooWoodle Pro plugin.
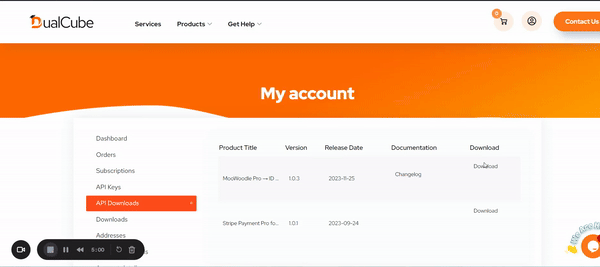
- Auth MooWoodle For Moodle (PRO): Download the Moodle plugin rom here – https://github.com/dualcube/moodle-auth_moowoodle
This functions as a bridge between your Moodle site and WordPress site. The corresponding document will guide you through the configuration process for the Auth MooWoodle For Moodle plugin.


